
Access internal applications with Entra Application Proxy
The way we work and the tools we use are changing rapidly. With more employees working remotely and using their own devices, the way organizations manage and secure their infrastructure must also evolve. OneFinance decided to adopt a work from home policy after the Covid-19 pandemic. Employees now work from home and need to access internal applications like SmartMoney. In this article I’ll explain how users can securely connect to internal applications by using Application Proxy.
What is Application Proxy?
Application Proxy functions as a reverse proxy for internal applications. Requests are routed through the Application Proxy service in Azure. This service then directs the request to connectors that operate inside the network, and the connector forwards the request to the application server. These connectors establish an outbound connection to the Application Proxy service, eliminating the need to open any inbound network ports. For secure remote access, Application Proxy utilizes Entra ID authentication.
Why not use VPN?
Previously, companies relied on VPNs for remote access to internal applications. Users had to install a VPN client on their devices and connect to the corporate system through it. This client set up a secure tunnel to the corporate network, letting users access internal applications. It basically means, that the network perimeter is extended to the user’s device because when connected to the VPN the user has access (if not restricted) to all internal resources. With a VPN we need to open inbound ports of the network. If attackers obtained credentials, perhaps via tactics like social engineering, they could exploit the VPN to infiltrate the internal network.
Hackers breached internal network of Avast through compromised VPN profile
The hackers compromised an employee's VPN credentials, that was not secured with MFA, and obtained access to the corporate network. Avast thinks that the attackers wanted to inject malware in their CCleaner software. Avast recognized the attack after finding out an unusual privilege escalation. After that the company monitored the hackers to analyze their behavior in the corporate network before taking action.
source: zdnet.comBy using Application Proxy, we can reduce the attack surface. Users that only need access to specific applications, don’t need to connect to the corporate network.
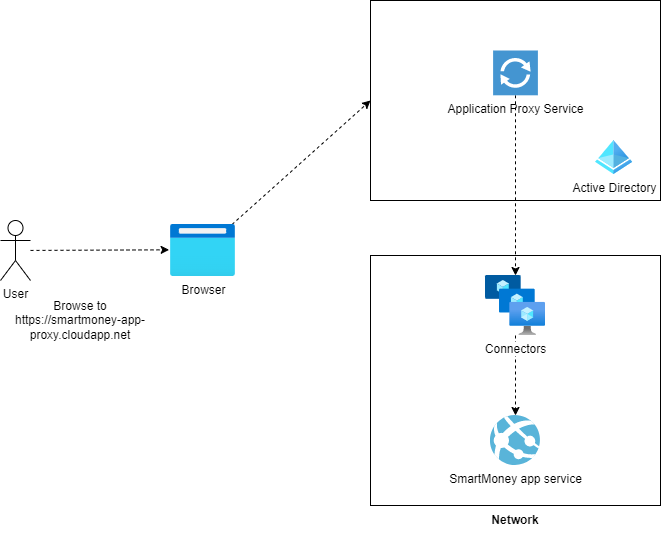
How does Application Proxy work?
- The user browse to the application proxy URL
smartmoney-app-proxy.cloudapp.net. - The request is routed to the Application Proxy service in Azure.
- The Application Proxy service authenticates the user against Entra ID.
- Checks if the user is allowed to access the application.
- The Application Proxy service forwards the request to the connector running inside the network.
- The connector forwards the request to the app service that runs on a private endpoint and is not reachable from the internet directly.
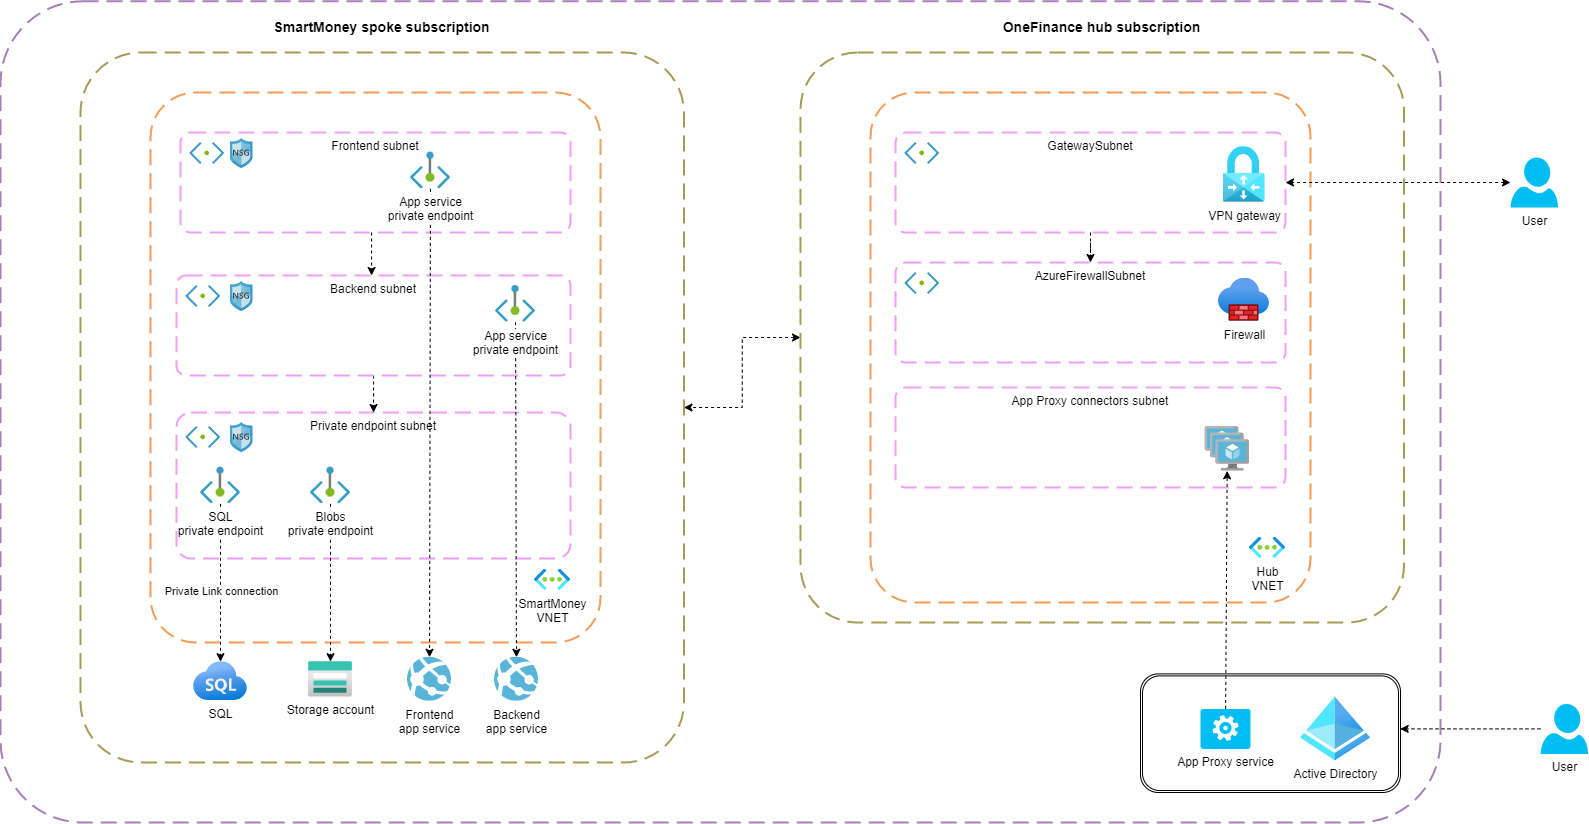
Below the updated architecture for the OneFinance/SmartMoney infrastructure
Benefits of using Application Proxy
- An outbound connection is established from the connector to the Application Proxy service in Azure. Means no inbound ports need to be opened in the corporate firewall.
- All traffic is terminated on the Application Proxy service which means that no direct HTTP (internet) traffic is required to the application.
- Users are authenticated against Entra ID. This can be combined with Conditional Access policies to enforce MFA. Only authenticated requests are allowed to the application.
- Application Proxy is protected against DDoS attacks by default.
Downsides
- Adding a proxy will add latency (more hops) to the application. By default, the Application Proxy service operates in the same region as the AD tenant. You can optimize this by creating a connector group and select a region. Users will be routed to the Application Proxy service in the selected region.
Connector
The connector is installed on a Windows Virtual Machine inside the network. The connector opens an outbound connection to the Application Proxy service. Requests are forwarded by the connector to the application server.
Connector groups are a collection of connectors. Each application that is configured in the Application Proxy service is linked to a connector group. The benefit of connector groups is that you can assign specific connectors to serve specific internal applications. This way you can isolate applications from each other. Connectors within the same group benefit from load balancing and offer enhanced availability.
Pre-authentication
There are two options for pre-authentication: Microsoft Entra ID and Passthrough. With Passthrough, the user is authenticated against the application itself. This is useful if you want to use the application’s own authentication mechanism. However, this does mean that anonymous attacks can hit your application. To prevent this, you can use Microsoft Entra ID as pre-authentication. All requests that hit the Application Proxy service are authenticated against Entra ID. Only authenticated requests are forwarded to the application. Another benefit of using Microsoft Entra ID as pre-authentication is that you can utilize conditional access policies to enforce MFA. And of course, you can offer users a single sign-on experience.
Implementing the Application Proxy
In the previous article, I explained how to secure PaaS services by enabling private endpoint and disable public access. I did this for the SmartMoney application, because only employees are allowed to use the application. Currently, if users browse to the application they will get a 403 error:

Let’s activate the Application Proxy for the SmartMoney application, allowing users to access it from the internet.
Create App Proxy in Entra ID
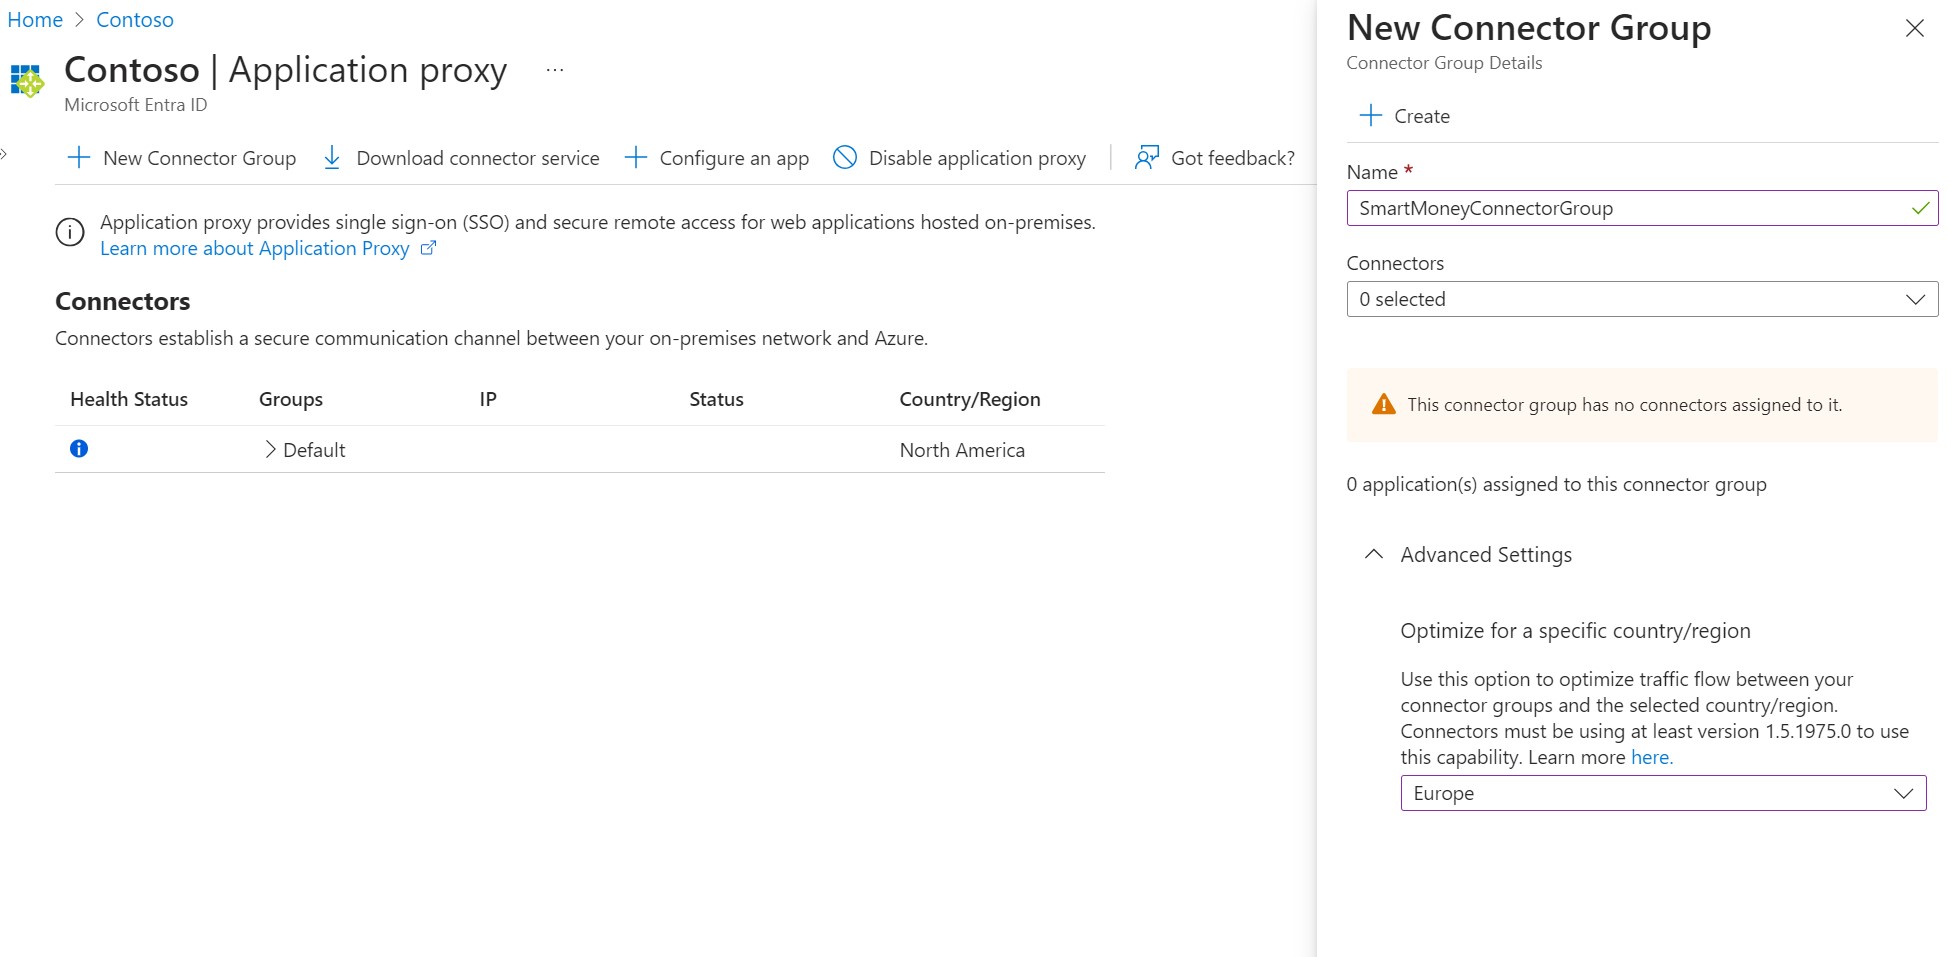
Unfortunately, there is no (official) Terraform support for creating an Application Proxy service. We need to create it manually in the portal. If you browse to Microsoft Entra ID and select Application proxy in the left menu, you’ll land on the Application Proxy service. First create a connector group.
Now click Download connector service in the toolbar. This downloads the executable file that needs to be installed on the Windows VM. In the code snippet below, I created a Windows VM in the hub network by using Terraform.
resource "azurerm_network_interface" "nic_connector" {
  count               = local.deploy_connector ? 1 : 0

  name                = "nic-connector"
  location            = azurerm_resource_group.rg_hub.location
  resource_group_name = azurerm_resource_group.rg_hub.name

  ip_configuration {
    name                          = "internal"
    subnet_id                     = azurerm_subnet.subnet_connector.id
    private_ip_address_allocation = "Dynamic"
    public_ip_address_id          = azurerm_public_ip.public_ip_connector[0].id
  }
}

resource "azurerm_public_ip" "public_ip_connector" {
  count               = local.deploy_connector ? 1 : 0

  name                = "pip-connector"
  location            = azurerm_resource_group.rg_hub.location
  resource_group_name = azurerm_resource_group.rg_hub.name
  allocation_method   = "Dynamic"
}

resource "azurerm_windows_virtual_machine" "vm_windows_connector" {
  count               = local.deploy_connector ? 1 : 0

  name                = "vm-connector"
  resource_group_name = azurerm_resource_group.rg_hub.name
  location            = azurerm_resource_group.rg_hub.location
  size                = "Standard_B2s"
  admin_username      = ""
  admin_password      = ""
  network_interface_ids = [
    azurerm_network_interface.nic_connector[0].id,
  ]

  os_disk {
    caching              = "ReadWrite"
    storage_account_type = "Standard_LRS"
  }

  source_image_reference {
    publisher = "MicrosoftWindowsServer"
    offer     = "WindowsServer"
    sku       = "2022-Datacenter"
    version   = "latest"
  }
}
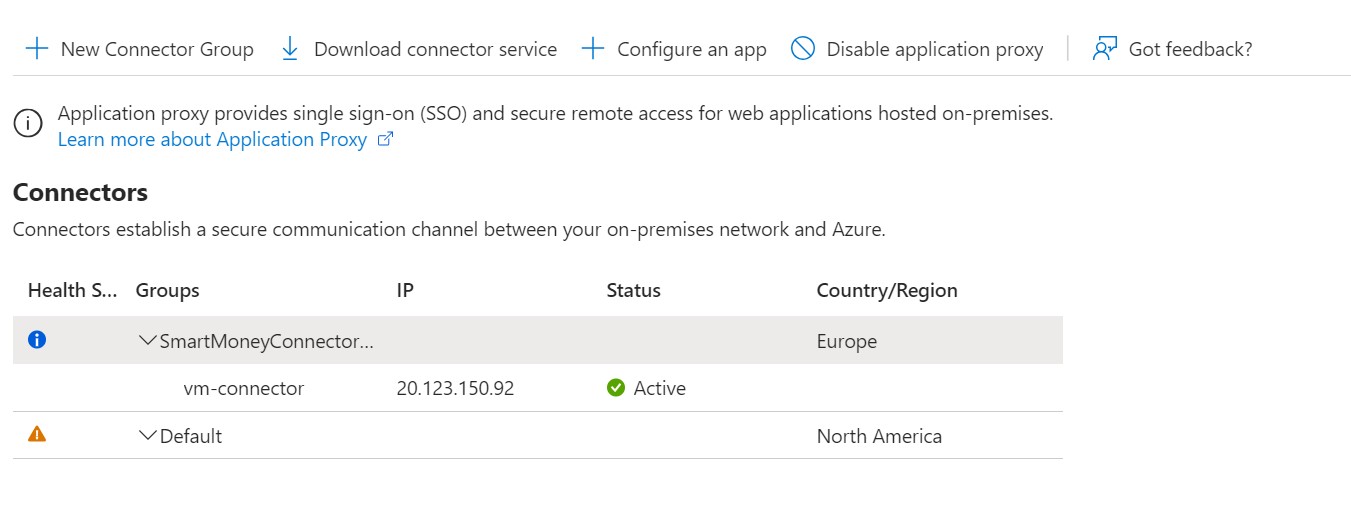
If the Windows VM is installed, use RDP to connect to the VM. Run the downloaded executable file and follow the wizard. You need to provide the credentials of an account that is Global Administrator of the tenant. After the connector is installed, you can verify the connection in the portal.
Since the VM operates within the network, it should have direct access to our App Service https://app-smartmoney-frontend-app.azurewebsites.net. (Remember private endpoint and public access is disabled for the App Service.) Let’s try it out:
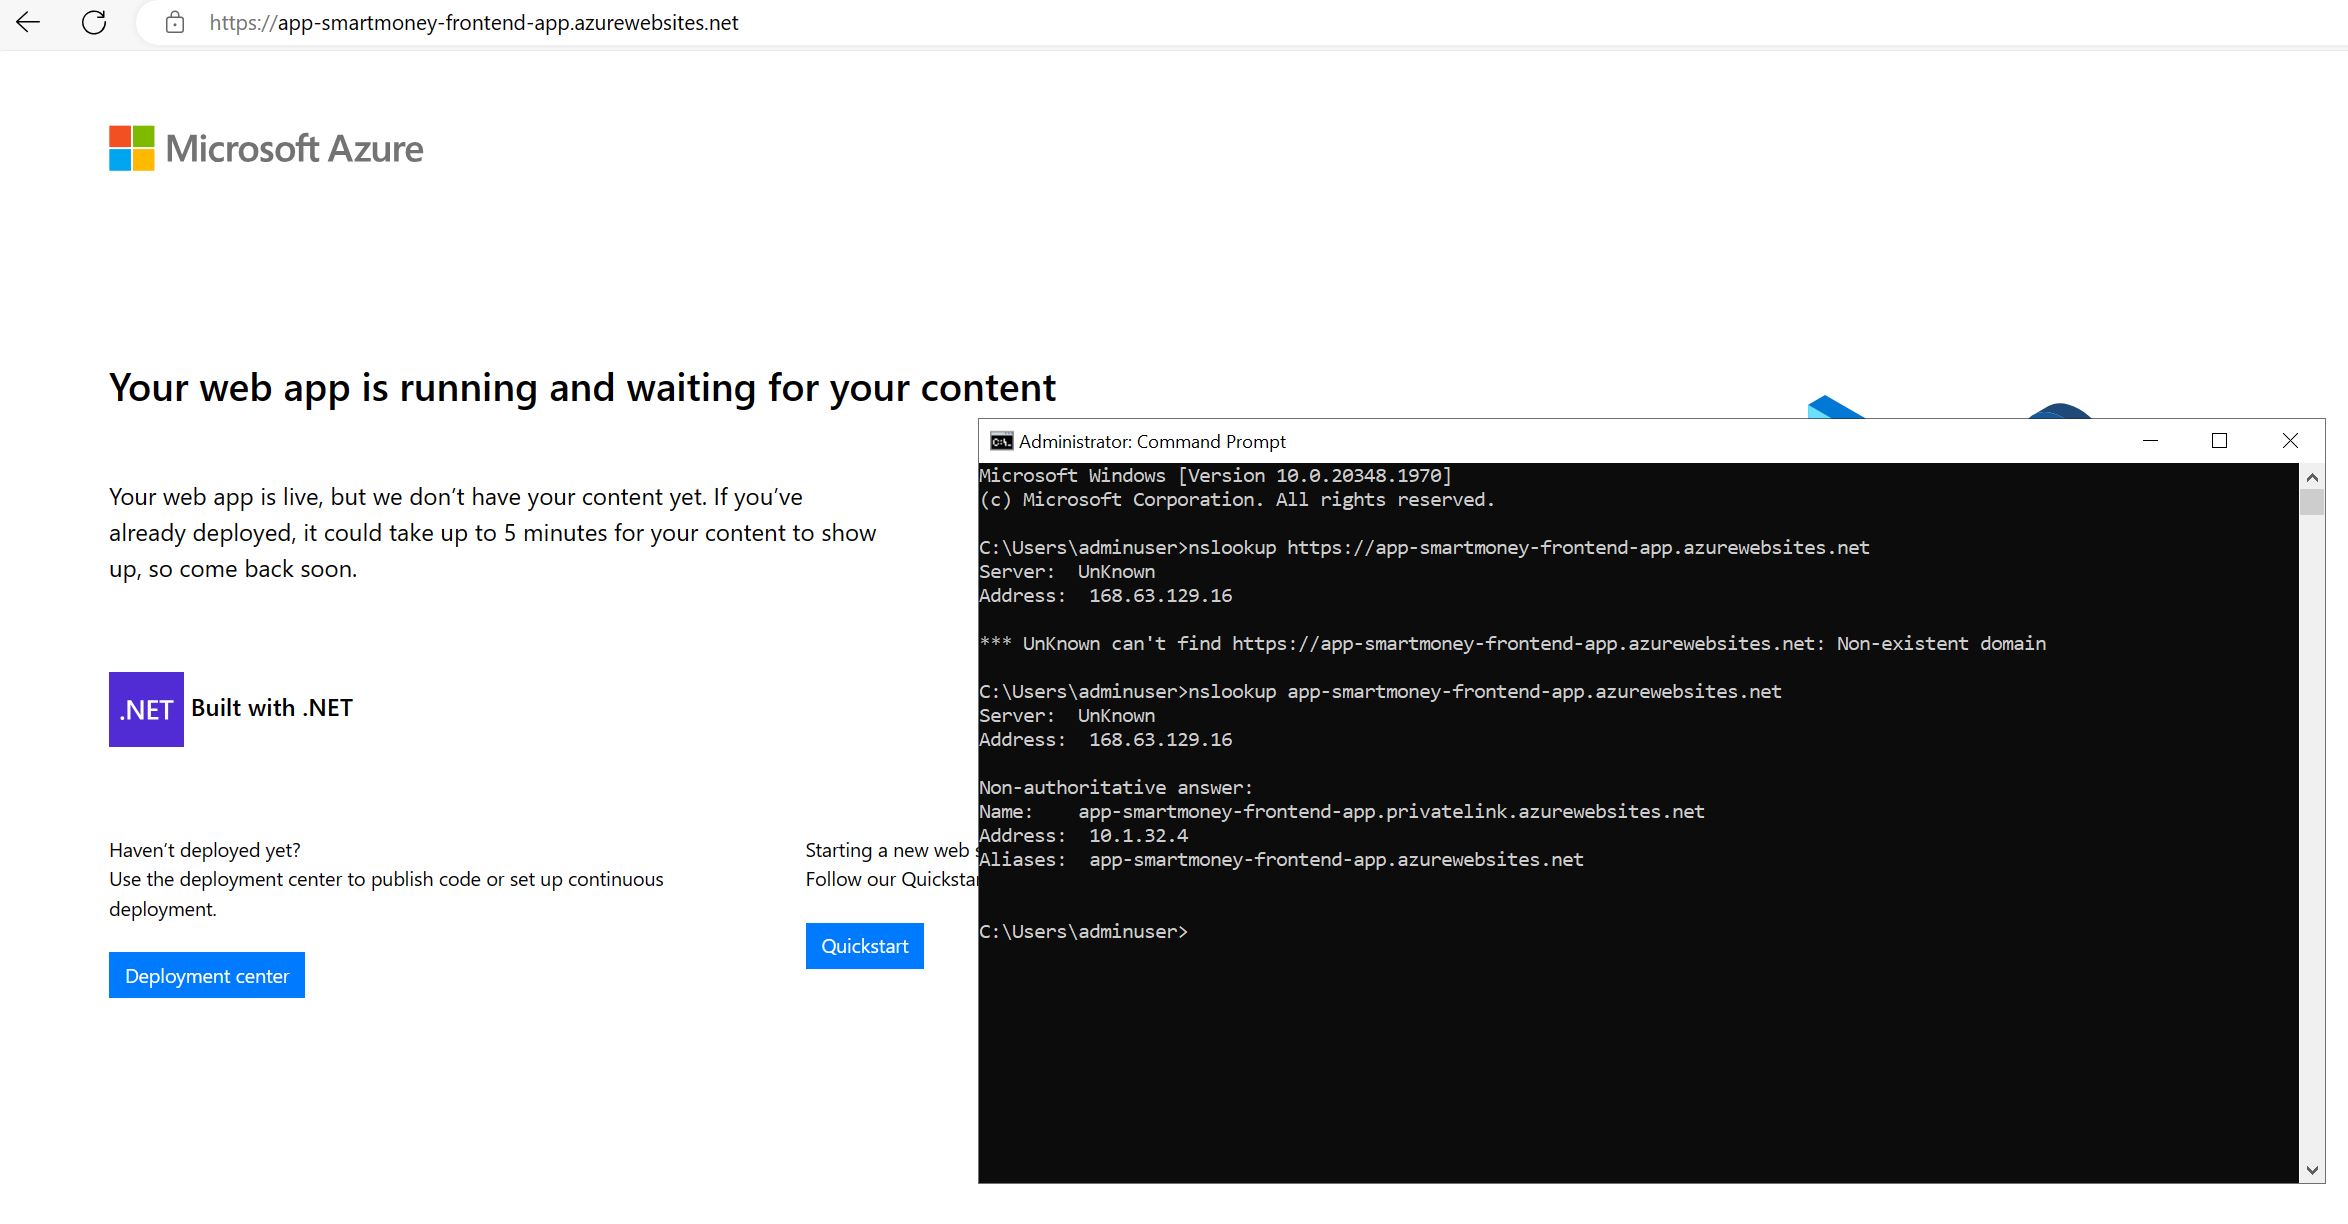
The screenshot shows the default page of the App Service which means the VM can access the App Service. The command prompt displays the nslookup for the App Service, and as expected it returns the private endpoint IP address.
With the connector connected to the Application Proxy service, it’s time to set up an application registration for the SmartMoney application. From the Application Proxy service, click the Configure an app in the toolbar. In the image below, you can see that we need to enter the internal URL of the application. Here we specify the URL of the App Service. An external URL is generated based on the name we assign to the app registration. Users will access the application using this URL. As explained earlier for the pre-authentication we can either select Microsoft Entra ID or Passthrough. I’ll leave this to Microsoft Entra ID.

After the application is created, we can browse to the external URL https://SmartMoneyApplication-m365x62225915.msappproxy.net. Before proceeding, we need to specify which users or groups should be granted access to the enterprise application. I’m setting up a new group named SmartMoney-Support below and granting it access to the application.
resource "azuread_group" "smartmoney_support_group" {
  display_name     = "SmartMoney-Support"
  types            = ["DynamicMembership"]
  security_enabled = true

  dynamic_membership {
    enabled = true
    rule    = <<-EOR
    (user.department eq "Customer Support")
EOR
  }
}

resource "azuread_app_role_assignment" "smartmoney_app_group_assignment" {
  app_role_id         = "00000000-0000-0000-0000-000000000000" # Default access
  principal_object_id = azuread_group.smartmoney_support_group.object_id
  resource_object_id  = data.azuread_service_principal.smartmoney_app_proxy.object_id
}
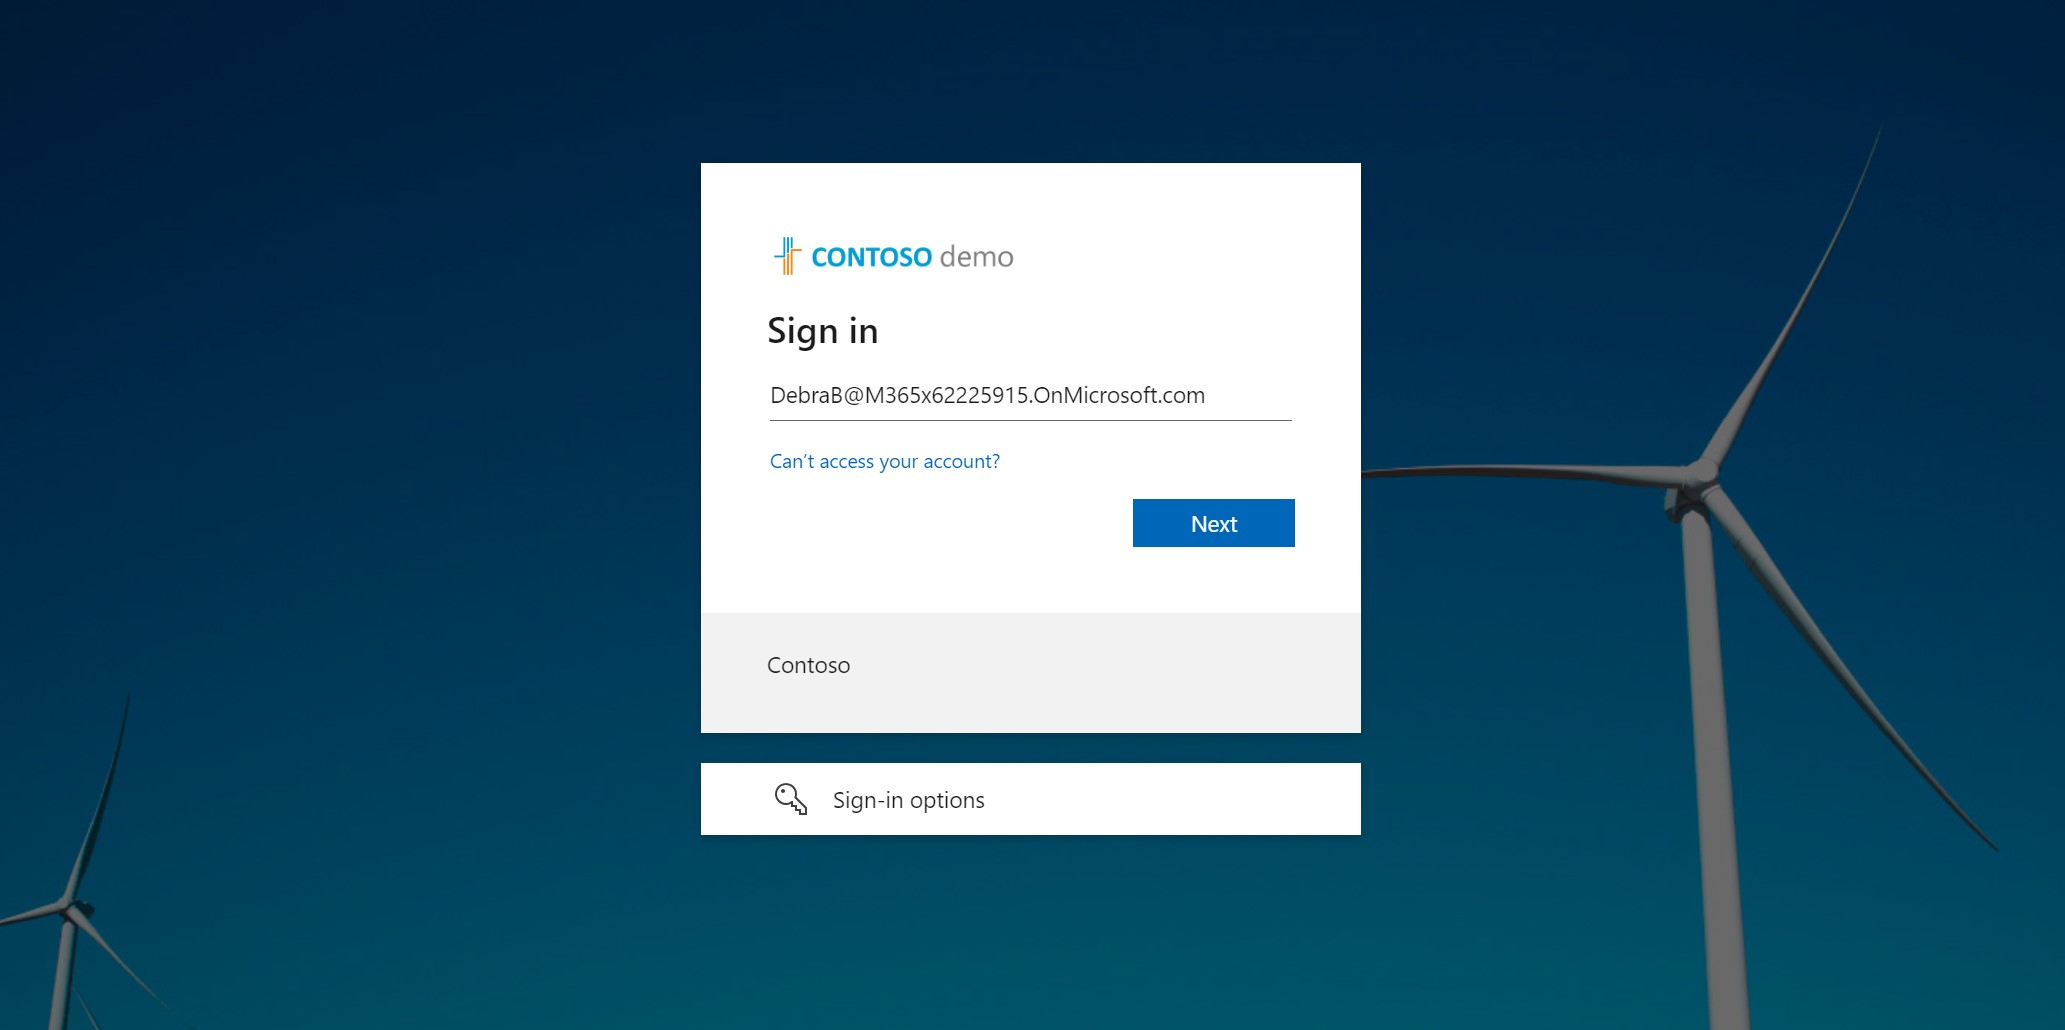
Once we added a user to the group, we can navigate to the external URL. This takes us to the Azure AD login page. After signing in, we’re directed to the SmartMoney application.
As always the source code can be found on GitHub.
Zero Trust principles
Verify explicitly
Application Proxy ensures that all requests to the application are authenticated by Entra ID. Conditional Access policies can be used to enforce MFA.
Least privileged access
With Entra ID, we can define which users and groups are allowed to access the application. We can also define which users are allowed to access specific parts of the application. Conditional access takes this a step further by restricting access based on various parameters like device and location.
I’ll discuss conditional access in Entra ID in an upcoming article.
Assume breach
By using Application Proxy, we minimize the need for VPNs. Users that only need access to specific applications, don’t need to connect to the corporate network. This reduces the attack surface. If a user’s credentials are compromised, the attacker can only access the application and not the entire corporate network. However, by enforcing MFA (with conditional access) we can reduce this risk.
What’s next
With OneFinance employees now having secure access to the SmartMoney application, it’s time to isolate workloads using network security groups. I’ll cover this in the next article.